
This comprehensive guide provides all the crucial steps and tips for creating compost specifically designed for indoor plants. From gathering materials and choosing the right compost bin to monitoring and maintaining the compost, every aspect of the process is covered in detail. Discover the key factors to consider when making compost for indoor use, including the organic materials to include, the best compost bin options available, and how to properly prepare, monitor, and harvest the compost effectively. Whether you’re a beginner or an experienced gardener, this guide will equip you with the knowledge and tools needed to create nutrient-rich compost for your indoor plants.
Key Takeaways:
- Gather Materials: Assemble the necessary items like organic materials, a compost bin, and water to start the composting process.
- Choose a Compost Bin: Select a suitable compost bin based on factors like size, material, and aeration capabilities for indoor composting.
- Prepare the Compost Bin: Set up the compost bin following the manufacturer’s instructions and ensure proper drainage and aeration with materials like twigs or straws.
- Add Organic Materials: Collect fruit and vegetable scraps, coffee grounds, and shredded paper to create a balanced mix of browns and greens in the compost bin.
- Monitor and Maintain the Compost: Regularly check moisture and temperature, turn the compost pile, and harvest the finished compost when it’s dark, crumbly, and earthy-smelling.

Basics of Composting
What is Compost?
One of the best ways to nourish your indoor plants is by creating compost, a nutrient-rich soil amendment made from organic materials. There’s a simple magic in composting – you take kitchen scraps, yard waste, and other biodegradable materials, and through the process of decomposition, you create a nutrient-dense substance that plants love.
The Science Behind Composting
Science plays a crucial role in the composting process. Composting is a natural biological process where microorganisms break down organic matter into a rich soil conditioner. By providing the right conditions of oxygen, moisture, and temperature, these microorganisms thrive and transform waste into valuable nutrients for plants.
Composting involves a complex interplay of factors to ensure successful decomposition. Understanding these key factors is necessary for creating high-quality compost for your indoor plants.
Key Factors Affecting Composting
- Carbon to Nitrogen Ratio: Maintaining the right balance between carbon-rich materials (browns) and nitrogen-rich materials (greens) is crucial for efficient composting.
- Moisture Levels: Compost needs to be damp but not overly wet to support microbial activity.
- Aeration: A proper oxygen supply is necessary for aerobic decomposition.
This intricate dance of carbon, nitrogen, moisture, and oxygen is what makes composting a fascinating process. Knowing how these factors interact can help you create nutrient-rich compost for your indoor plants.
Preparing to Compost

Composting Do’s and Don’ts
Many factors contribute to successful indoor composting. To ensure optimal results, remember to maintain a proper balance of greens (nitrogen-rich) and browns (carbon-rich) materials, turn the compost regularly, and monitor moisture levels. On the other hand, don’t add meat, dairy, or pet waste to your indoor compost bin as they can attract pests and slow down the composting process.
The Right Location for Your Indoor Compost Bin
One of the important aspects of indoor composting is choosing the right location for your compost bin. Ideally, place your compost bin in a shady spot that is easily accessible and away from buildings to minimize odors. Ensure there is enough space around the bin for airflow and maintenance.
Composting indoors provides numerous benefits but also requires attention to safety precautions. When setting up your indoor composting system, remember to prioritize safety with these tips:
Safety Tips for Indoor Composting
- Wear gloves to protect your hands from potential hazards.
- Avoid adding meat, dairy, or pet waste to prevent attracting pests.
- Keep children and pets away from the compost bin to prevent accidents.
For instance, ensure proper ventilation in the area where you place the compost bin to prevent the buildup of harmful gases. Additionally, You should always wash your hands after handling the compost to avoid contamination.
Gathering Materials
Choosing Your Compost Ingredients
Many materials are crucial for creating indoor compost for your plants. From kitchen scraps to yard waste, gathering the right ingredients is crucial for successful composting. Ensure you have a compost bin or container ready to hold your organic materials.
Balancing Greens and Browns
Clearly understanding the balance between greens and browns is key to creating high-quality compost. Greens provide nitrogen, while browns offer carbon. Aim for a 2:1 ratio of browns to greens to achieve optimal decomposition and create nutrient-rich compost for your indoor plants.
What to Avoid in Indoor Compost
With indoor composting, it’s important to know what to avoid. While fruit and vegetable scraps, coffee grounds, and shredded paper are great inputs, steer clear of adding meat, dairy, and pet waste. These items can attract pests and slow down the composting process.
While adding materials like grass clippings, leaves, and coffee grounds can enhance your indoor compost, avoid items like meat and dairy products as they can lead to unpleasant odors and attract pests like rodents. By carefully selecting your compost ingredients, you can ensure a healthy and efficient composting process.
Choosing a Compost Bin
Types of Compost Bins Suitable for Indoor Use
All indoor gardeners must carefully consider the type of compost bin they choose for their indoor plants. Luckily, there are various options available, such as countertop electric composters and tray-based composters like the Worm Factory 360, that are specifically designed for indoor use. After gathering materials for composting, selecting the right bin is the next crucial step.
| Lomi by Pela | Automatic composting appliance that utilizes sensors to break down food scraps into compost. |
| Vitamix FoodCycler FC-50 | Convenient and efficient, converting food scraps into compost in just 24 hours. |
| Worm Factory 360 | Tray-based composter designed for vermicomposting, utilizing red wiggler worms for organic waste breakdown. |
| Worm Cafe | Similar to the Worm Factory 360, a multi-tray composter ideal for vermicomposting. |
| Can-O-Worms | Bucket-style composter designed for vermicomposting, offering easy access to finished compost. |
DIY vs. Store-Bought Compost Bins
Bins used for indoor composting can either be purchased from a store or created as do-it-yourself projects. DIY bins offer customization options, whereas store-bought bins provide convenience and ready-to-use features. After considering your composting needs and preferences, the choice between DIY and store-bought bins should align with your indoor gardening goals.
Size and Space Considerations
Suitable compost bins for indoor use should be chosen based on the available space in your indoor garden area. From compact countertop bins to larger tray-based composters, the size of the bin must accommodate the amount of organic waste generated. Considering space constraints is crucial to ensure effective composting without overcrowding the indoor environment.
Preparing the Compost Bin

Creating a Compost Bin Setup
Set up your compost bin by choosing a suitable location that is shady and easily accessible. Assemble the bin according to the manufacturer’s instructions, adding twigs or straw at the bottom to improve drainage and aeration. Start adding a mix of browns and greens like fruit peels, coffee grounds, and shredded paper to kickstart the composting process.
Tips for Maintaining a Clean Composting Environment
- Avoid adding meat, dairy, or pet waste to the compost to prevent pests and odors.
- Keep the compost bin covered to retain moisture and heat.
- This helps to create an optimal environment for decomposition and minimize unpleasant smells.
Clearly, maintaining a clean composting environment is crucial for successful indoor composting. By following these simple tips, you can ensure that your composting process is efficient and odor-free.
Initial Layering Techniques
Composting begins with layering. Start by creating a base layer of twigs or straw, followed by alternating layers of browns and greens materials to achieve a balanced mixture. This layering technique helps to create the ideal environment for composting microorganisms to thrive and break down the organic matter efficiently.
Adding Organic Materials

How to Layer Your Compost Ingredients
After gathering your organic materials for composting, it’s imperative to layer them properly in your compost bin. While it might seem simple, creating a balanced mixture of ‘greens’ and ‘browns’ is crucial for successful composting. The layering technique helps maintain the right balance of nitrogen and carbon, promoting decomposition and preventing odors.
Understanding the Nitrogen-Carbon Ratio
Clearly understanding the nitrogen-carbon ratio in your compost is key to its success. This ratio should ideally be 2:1, with ‘greens’ providing nitrogen and ‘browns’ providing carbon. Another important factor to consider is the balance between wet and dry materials. Too much nitrogen-rich waste can result in a smelly and slimy compost, while too much carbon-rich material can slow down the decomposition process.
Tips for Adding Kitchen Waste
For optimal composting, follow these tips for adding kitchen waste:
- Chop or shred fruit and vegetable scraps to speed up decomposition.
- Layer kitchen waste with dry materials like shredded paper or cardboard to maintain the right balance.
- Mix in grass clippings or coffee grounds for added nitrogen.
Recognizing the right balance of materials will help ensure a healthy compost pile.
Incorporating Plant Cuttings and Other Organics
Compost Ratio isn’t just about kitchen scraps – incorporating plant cuttings, weeds, and other organic materials can add valuable nutrients to your compost. Understanding how these materials contribute to the overall balance of your compost pile is imperative for successful composting. By mixing in a variety of organics, you can create a rich, nutrient-dense compost that will benefit your indoor plants.
Monitor and Maintain the Compost

How Often to Check Your Compost
Now, your indoor compost needs regular monitoring to ensure optimal conditions for decomposition. Check the moisture levels at least once a week and adjust as needed. Additionally, monitoring the temperature and turning the compost every few days will help accelerate the process.
Identifying Signs of Healthy Compost
Any successful indoor composting endeavor relies on recognizing the signs of healthy compost. Look for dark, crumbly texture and earthy smell which indicate that the compost is well on its way to being mature.
Check for a proper carbon-to-nitrogen ratio in the compost to ensure a balanced decomposition process. A healthy compost pile should also maintain an ideal temperature range of 120-140°F (49-60°C) for optimal microbial activity.
Troubleshooting Common Composting Issues
Compost troubleshooting may become necessary to address common issues that can arise during the indoor composting process. Keep a lookout for signs of foul odors, which could indicate anaerobic conditions. Additionally, if the compost pile appears too wet or too dry, adjustments are needed to maintain the right moisture levels for decomposition.
Monitor the compost bin regularly to address any potential issues promptly and ensure a successful indoor composting experience.
Turn and Aerate the Compost
Techniques for Aeration and Turning
Despite the initial setup of your indoor compost, the key to successful composting lies in regular turning and aeration. Turning the compost pile every few days ensures that all the materials are mixed thoroughly, promoting decomposition. This process also helps to prevent odors and create an ideal environment for beneficial microorganisms to thrive.
How to Aerate Without Making a Mess
Little mess is involved in aerating your compost pile when using the right techniques. To aerate without creating a mess, gently insert a compost aerator or shovel into the pile and turn it in a circular motion. This will allow oxygen to reach the center of the compost, aiding in the decomposition process.
Now, when aerating your compost pile, it’s necessary to be mindful of the surrounding area to avoid creating a mess. Aerate gently to prevent spilling or scattering of compost materials. This method helps maintain a tidy composting space while ensuring optimal aeration for the organic matter to break down effectively.
The Right Tools for Aeration
Techniques
Compost aerators or shovels are the ideal tools for aerating your indoor compost pile effectively. These tools allow you to reach the center of the pile without causing disruptions or making a mess. Additionally, using a pitchfork can help turn the compost pile efficiently, ensuring proper aeration and even decomposition.
It’s crucial to have compost aerators or shovels as they provide a convenient way to aerate the compost pile without causing a mess. These tools facilitate the process, ensuring that sufficient oxygen reaches all parts of the compost for optimal decomposition. Using the right tools not only makes the task easier but also enhances the overall composting experience.
Managing Moisture and Temperature
Ensuring Proper Moisture Levels
Little moisture is crucial in indoor composting to facilitate the breakdown of organic materials. To ensure proper moisture levels, aim for a damp consistency in the compost pile. Add water as needed, ensuring the compost is moist but not soggy. Regularly check and adjust the moisture levels to promote efficient decomposition.
Temperature Control in Indoor Composting
One key factor in successful indoor composting is maintaining the ideal temperature range of 120-140°F (49-60°C) for optimal decomposition. Regularly monitor the temperature using a compost thermometer and adjust as necessary. Insulate the compost bin during colder temperatures to keep the process active and effective.
Another aspect to consider for temperature control is ventilation. Proper aeration of the compost pile helps regulate internal temperature and promotes the activity of beneficial microorganisms.
Tips for Managing Smell and Pests
Moisture can attract pests and cause odors in indoor composting systems. To manage smell and pests effectively, consider the following tips:
- Keep the compost bin covered
- Avoid adding meat, dairy, or pet waste
- Regularly turn and aerate the compost
Knowing how to control these factors can help maintain a healthy and odor-free composting environment.
Understanding the importance of moisture and temperature regulation in indoor composting is crucial for successful compost production. By following these guidelines, you can create a thriving composting system that benefits both your indoor plants and the environment.
Harvesting the Compost

How to Know When the Compost is Ready
Once again, knowing when your compost is ready is crucial to ensure its effectiveness. You can tell that the compost is ready to harvest when it has turned into a dark, crumbly texture with an earthy smell. This indicates that the organic materials have broken down successfully, creating nutrient-rich compost for your indoor plants.
Methods for Harvesting Your Compost
Any experienced composter knows that harvesting compost is a rewarding process. You can use various methods to collect your finished compost, such as using a shovel or compost scoop to remove the compost from the bin and checking for any remaining worms in case of a worm bin. This ensures that you only harvest the finished compost for your plants’ benefit.
A common mistake that many beginners make is not properly checking the compost for any remaining worms before harvesting. It is important to return any worms to the bin to continue the composting process and maintain a healthy ecosystem within your compost.
Storing Finished Compost
With your freshly harvested compost, it’s important to know how to store it properly for future use. Store the finished compost in a sealed container or bag in a cool, dry place to preserve its quality until you are ready to use it for your indoor plants. Proper storage ensures that your compost remains effective and ready to enhance your plant’s growth.
Your compost can be stored for future use in your indoor plants or garden. Remember to check the moisture level of the stored compost occasionally to ensure it remains optimally effective for your plants’ needs.
Using the Compost for Indoor Plants

How to Apply Compost to Your Plants
Not sure how to apply the compost you’ve worked so hard to create to your indoor plants? Some simple methods include top dressing your plant’s soil with a layer of compost, mixing compost into the soil when repotting, or creating compost tea to water your plants with.
Compost Teas and Extracts
Apply compost teas and extracts to boost the nutrient content of your indoor plants. This liquid fertilizer is made by steeping compost in water and can be sprayed on plant foliage or poured directly onto the soil. Compost teas contain beneficial microorganisms that can improve plant health and growth.
Frequency and Amounts
Some indoor plants may require more frequent compost applications than others. For example, plants with high nutrient needs or fast growth rates may benefit from more regular compost treatments. Frequency may range from every 2-4 weeks for heavily feeding plants to every 6-8 weeks for moderate feeders. Ensuring you provide the correct amount of compost is crucial to avoid over or under-fertilizing your plants.
Innovative Composting Methods
Vermicomposting Inside Your Home
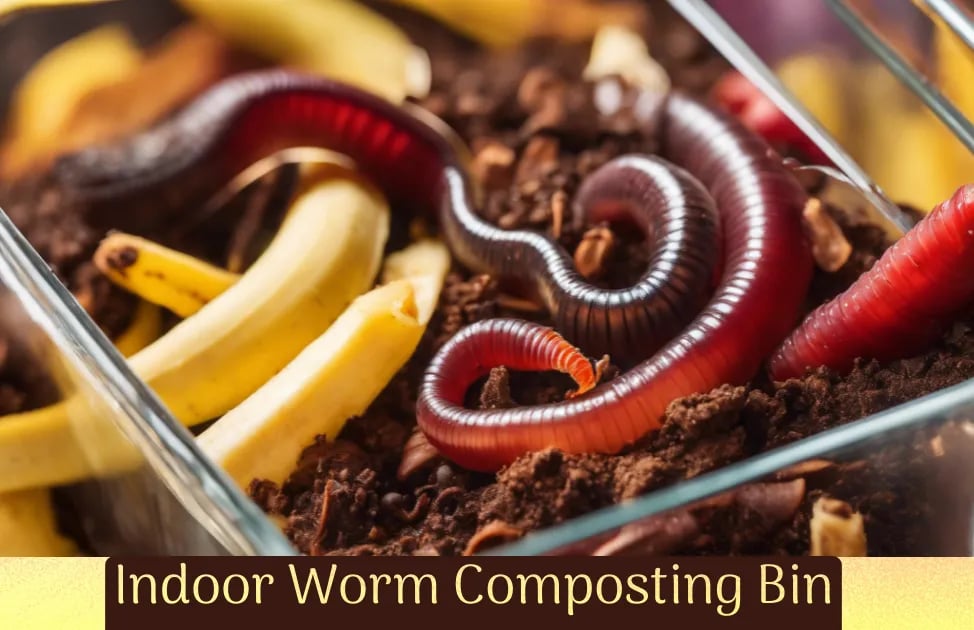
Now, vermicomposting is a fantastic way to create nutrient-rich compost inside your home. Little space is needed for a worm bin, and red wiggler worms can efficiently break down organic waste. A Worm Factory 360 or a Worm Cafe are popular tray-based composters designed for vermicomposting indoors.
Bokashi: Fermenting Compost for Indoor Use

While bokashi composting may not be as well-known, it is a powerful method for fermenting organic waste. Bokashi systems use special bran to accelerate the fermentation process, creating a rich fertilizer that can be used for indoor plants. Another advantage is that bokashi composting can handle a wider variety of materials, including dairy and meat scraps.
Electric Composters: Pros and Cons
Cons: While electric composters like Lomi by Pela and Vitamix FoodCycler FC-50 are convenient and efficient, some drawbacks include their high upfront cost and reliance on electricity to operate. On the other hand, these composters can handle a range of organic materials quickly and are odor-free, making them suitable for indoor use.
Composting for Different Types of Indoor Plants
Unlike outdoor composting where a variety of materials can be used, indoor composting for plants requires specific focus on the needs of different types of plants. Adjusting compost mixtures can help ensure optimal growth for different plant varieties. Note, that each plant requires a unique balance of nutrients from the compost. Thy knowledge of plant requirements is necessary for successful indoor composting.
| Flowering Plants | Foliage Plants |
| More nitrogen-rich materials for vibrant blooms | Focus on carbon-rich materials for steady growth |
| Regular monitoring for proper bloom development | Consistent watering for lush foliage |
| Balance of brown and green materials for ideal growth | Avoid excess moisture to prevent root rot |
| Turning and aerating for better nutrient absorption | Optimal sunlight exposure for photosynthesis |
| Harvest maturity indicator: vibrant, colorful blooms | Harvest maturity indicator: dense, lush foliage |
Adjusting Compost for Flowering Plants vs. Foliage Plants
One necessary aspect of indoor composting is adjusting the compost mixtures to cater to the specific needs of flowering plants versus foliage plants. Flowering plants require more nitrogen-rich materials for vibrant blooms, while foliage plants thrive with a focus on carbon-rich materials for steady growth. Regular monitoring for proper bloom development and consistent watering for lush foliage are key considerations when adjusting compost for these different plant types. Note, a balanced blend of brown and green materials is crucial for optimal growth, and turning and aerating the compost regularly can help ensure better nutrient absorption.
Specialty Composts for Cacti and Succulents
Specialty composts are necessary for the successful indoor cultivation of cacti and succulents. These plants have unique requirements, including well-draining soil and minimal moisture retention. Specialty compost for cacti and succulents often includes a mix of sandy soil, perlite, and coarse sand to replicate their natural environment. Utilizing compost specifically tailored to these plants can ensure optimal growth and health. Remember to adjust watering schedules accordingly and provide adequate sunlight for the best results.
Homemade Potting Mixes Incorporating Compost
Composting can be an integral part of creating homemade potting mixes for indoor plants, offering a natural source of nutrients and beneficial microorganisms. Incorporating compost into potting mixes can improve soil structure, enhance water retention, and provide necessary nutrients for plant growth. A mix of composted kitchen scraps, peat moss, vermiculite, and perlite can create a well-balanced potting mix for indoor plants. Experiment with different compost ratios to find the ideal blend for your specific plant needs, ensuring healthier and more vibrant growth.
Conclusion
With these considerations, you can successfully create nutrient-rich compost for your indoor plants. By gathering the necessary materials, choosing a suitable compost bin, adding organic materials, monitoring and maintaining the compost, turning and aerating it regularly, and finally harvesting the finished compost, you can ensure a sustainable and eco-friendly way to nourish your plants. Whether you opt for a countertop electric composter, a worm bin, or a DIY compost bin, following these steps will help you in the process of composting effectively. Remember to balance the green and brown materials, maintain proper moisture levels, and monitor the temperature for optimal decomposition. By practicing these techniques, you can transform your kitchen scraps and yard waste into a valuable resource for your indoor garden.
FAQ
Q: What materials are needed to make compost for indoor plants?
A: To make compost for indoor plants, you will need organic materials such as fruit and vegetable scraps, coffee grounds, and dry leaves. You will also need a compost bin or container, water, and optionally a compost activator or starter culture.
Q: What are some options for indoor compost bins?
A: Indoor compost bin options include countertop electric composters like Lomi by Pela and Vitamix FoodCycler FC-50, as well as tray-based composters like Worm Factory 360, Worm Cafe, and Can-O-Worms. Other options include the Bokashi Composting System and DIY compost bins made from totes or buckets.
Q: How do you maintain and harvest indoor compost?
A: To maintain indoor compost, monitor the moisture and temperature regularly, aerate the compost by turning it, and add organic materials as needed. When the compost is ready, harvest it by checking for maturity, removing it from the bin using a shovel or compost scoop, and storing it in a sealed container. Use the finished compost to enrich your indoor plants.